
Yet Another Sushi


But it's a new rolling technique that I am really excited about. The last two times I made sushi, I rolled the rice and veggies fillings in nori sheets all right, but they seemed to tear when I cut it into pieces. So I improvised. And I am so, so pleased with the results I am getting from this rolling technique.

First, get your ingredients in order. Cook 1/2 cup sushi rice or any short grain rice you have, as per package directions. Mine says to soak the rice for 15 minutes, then cook on a low heat for 20. While the rice cooks, mix 2 tbsp rice vinegar with 3/4 tbsp sugar and a pinch of salt, heat in the microwave for 10 seconds until boiling and well blended. Spread the cooked rice on a place and pour the warm vinegar mixture over it. Cut your filling in thin strips. I didn't want my babycorn raw, so I put it in the microwave with a tbsp of water for 30 seconds, then spread it on a plate and let it cool. I also found a handful of good looking mint leaves.

I hope you bought your nori sheets pre-toasted, but toast them now for just a few seconds if you didn't and let cool. Now, pick up some clean kitchen scissors and cut the nori sheet into six long strips. Pile the six sheets together and cut a small section off each - roughly 1/4th the strip length, you need enough to just roll your filling. Pick each of these shorter sections in turn, place your filling on one side and roll to form a small cylinder. My babycorn was still warm but you might need a little water to seal.

Now pick the longer strip, wet your hands with cold water and spread rice all over it, leaving a little (maybe a cm) blank at one end. On the other end, put your filling cylinder, then roll and press the other end to seal. Again, if it doesn't close automatically with the steam from warm rice, use a little water.

I tired of rolling by the time I made my first six, so I still have plenty of rice left over. You could either roll another six sushi, or top your rice with some fried onions and mint and pack it for lunch (which is what I am doing at the moment).

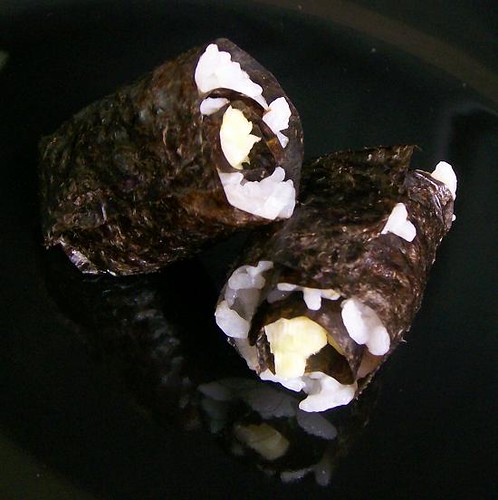
This black and white sushi is my entry for Jugalbandi's Click : Bi-colour.

Comments

gal..I never tasted sushi so far and u r posting sushi again n again...Hope you make this for me when I visit you..:)
n BTW that roll looks yummy dear..
CurryLeaf said…
Hey another Sushi.I think you are perfecting the sushi.Looks inviting but I prefer your rainbow sushi
Anonymous said…
I had sushi once from a rest..but havent tried at my kitchen yet..thats a fine wrap ..
Rush said…
i know i may sound like a critic here, but for someone who loves sushi i must say this ..its pretty untidy.

With sushi..i definitely eat with my eyes first..i know u must be hating me now, but a honest opinion, thats all..im not trying to be bad, i just am just plain sushi crazy..i wanna see a better wrapped roll.
i will shut up from now on, if u dont like me :(
Ria Mathew said…
Looks good and perfect entry for CLICK!!
Anonymous said…
it's beautiful. thank you.

Popular posts from this blog

Kadhi Chawal

I just can't think of what to write today. That's what my absolute favorite meal does to me, I just want to stop talking and dig right in. So I won't ramble and go straight on the recipe for kadhi. First, make the pakoras that would go in the kadhi. Slice an onion lengthwise. Make a batter with 1/2 cup chickpea flour (besan), salt, red chilli powder and water. Dip onions in this batter and deep fry until crisp. Keep aside. Now blend 1 cup yogurt and 1/3 cup besan into a paste. Add 3-4 cups water to make a very thin blend. Heat a tbsp of oil in a pan. Add a tsp each of mustard seeds, cumin seeds, ajwain (carom seeds) and methre (fenugreek seeds). Let splutter for a few seconds. Now add a large onion, cut lengthwise into thin slices and cook until browned lightly. Pour in the yogurt/besan mix and add 1 tsp turmeric powder, 1 tsp salt and 1/2 tsp red chilli powder. Bring to a boil, reduce the heat and let simmer for at least half an hour. You have to stir this occasio...

Bibimbap

This is the reason I love taking part in Taste & Create . There is so much new to learn and try when you meet new partners. This month, I am visiting Kitschow in Vancouver for a course in Asian cooking. She also tries a lot of other cuisines, but wok is her favorite way to cook. I first thought I'd find very little vegetarian choice at her place. But as luck would have it, she has recently done a lot of vegetarian cooking and eating for lent and I had a virtual rainbow to pick from. Everything looked so delicious it was tough to pick one. I picked the one with the cutest name : Bibimbap . Bibimbap is a Korean rice, usually topped with beef and vegetables but Kitschow made a vegan version for Lent. The recipe has three parts. First you cook the rice. Then, when it's almost done but is still moist, you arrange vegetables on top so it looks colorful and pretty. For the vegan version, Kitschow just put raw veggies there and let them cook in the steam. But I liked the i...

Dukkah

Talk about myths busted. I went to Dubai planning to buy zat'ar, the fragrant herb and spice mix. And Dukkah, the interesting blend of nuts and spices. Not sumac, because I still have a pack left in my fridge. So zat'ar was easy - every Carrefour supermarket had that one. But no one had dukkah and I was like, how can they not have dukkah? It's a middle eastern thing, right! But well, they don't sell dukkah in Dubai, so I came back and armed with recipes from 10-odd blogs (all roughly the same), I set to make my own. The key to making dukkah is : line up all your ingredients, toast each of them separately in a heavy non-stick pan till they are fragrant and lightly roasted, then put everything in a blender and grind coarsely. This is your dukkah. Now dip your bread in olive oil, then dip it in dukkah and indulge. A final word of warning: this can be highly addictive. And finally, my list of ingredients: 1/4 cup almonds 2 tbsp coriander seeds 1 1/2 tbsp sesame...